Fairfurt UK | Vendors / Sellers Store Set Up Guide
Give Your Business A Boost
Overview
Seamless registration process of our vendors / sellers is paramount to our business. With Fairfurt UK marketplace, vendors can can register themselves in our marketplace and in this section we will discuss the steps for vendor registration and it’s associated settings in our marketplace solution. Our vendors are our partner in business as we grow together. This is a very important aspect of our marketplace solution and Fairfurt gives you a clean & an easy interface to start or expand your business.
Vendor Registration
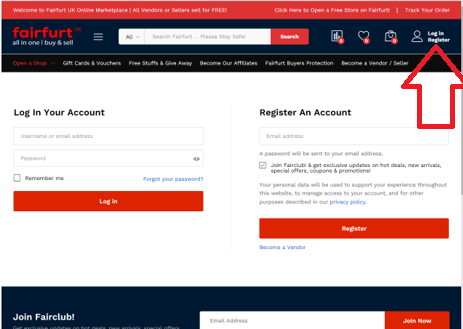
Pic 1: Log in or Register
Once clicked, the user will be redirected to our default vendor registration page.
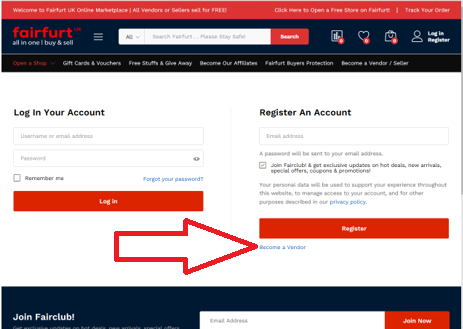
Pic 2: Registration Option in Front-end Menu:
Click on “Become a vendor” link in My-account page as shown below.
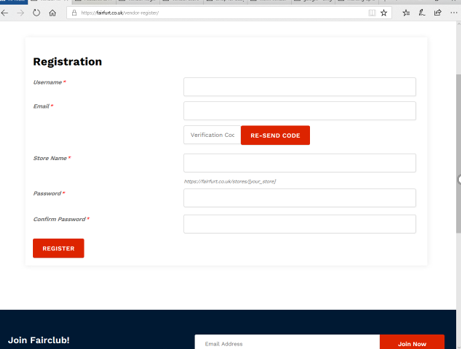
Pic 3a: Default Vendor Registration Form
Once clicked, the user will be redirected to our default vendor registration form which has to be filled for vendor application. Here’s a screen-grab of default form you will see for vendors to register.
Email Verification Code: This is an email verification process for the vendors wherein a code will be sent to the registered email id and the vendor is prompted to enter this code for completing the verification process. So check your email to proceed!
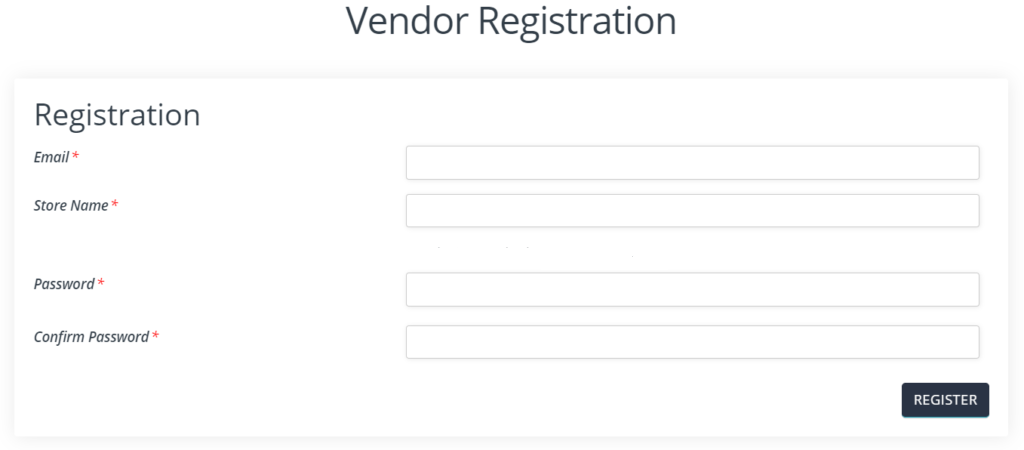
Pic 3b: Already a user who wants to get registered as a vendor...No worries!
As a user who wants to get registered as a vendor, you will get a default form like this.
Note: There is no email verification as you are already a registered user.
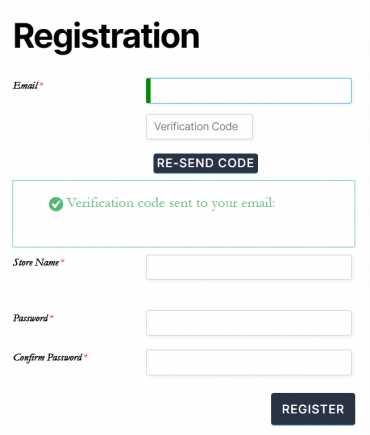
Pic 4: Email Verification Code
You will receive a mail with your verification code. Click on “verification code” box of the registration form to add the code you received in the email. Add other relevant vendor details to continue.
Store Set-up
Pic 5: Fairfurt Store- Setup Wizard
Whenever a vendor completes their registration, they will be redirected to a Fairfurt Store- Setup Wizard which will allow the vendor to enter essential data to kick-start their store, here’s a screen-grab of the wizard for better understanding.
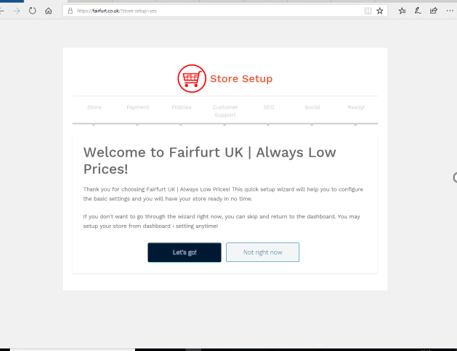

Pic 5: Fairfurt Store- Setup Wizard [Cont]
Let’s go!: Start with the one by one steps of store setup wizard.[Recommended]
Not Right Now: Skip the wizard to go to your vendor dashboard and complete the set up later.
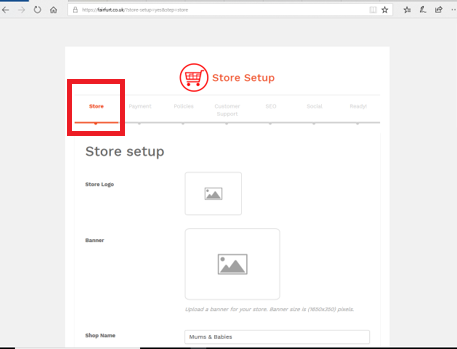
Pic 6: Step 1 - Store
In the initial step, the vendor has to fill up the store details, such as store logo, banner, address of the store, location and store description. Note that few fields will be pre-filled (such as store email, name etc. which are present as registration field), you can fill up the remaining fields. At any stage you don’t have the information required, you can skip the step.
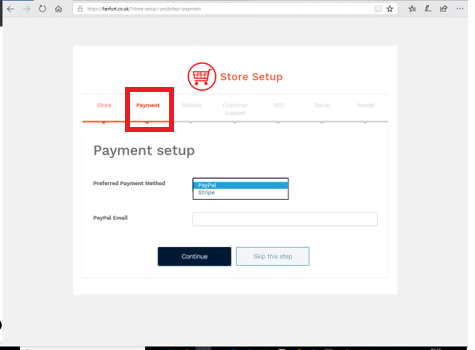
Pic 7: Step 2 - Payment
This is perhaps the most important step of all where the vendor will setup their payment account from the available payment methods supported. By default Fairfurt allows the following payment gateway for vendor(s) as shown in the following screenshot and more will be added as required.
For every payment method, the vendors will have to fill out the relevant details and move to the next step of policies.
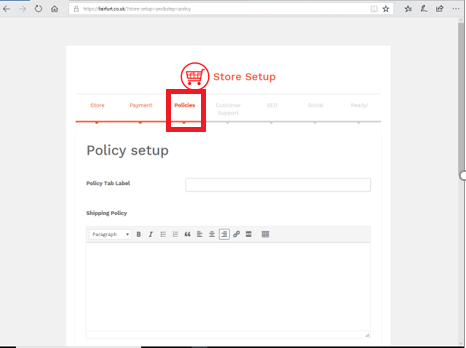
Pic 8: Step 3 - Policies
In this step the vendor can enter their store policies like refund policy, shipping policy and cancellation policy. Additionally, you can set the label for policy tab from here or from your dashboard.
Any skipped information can be completed from your dashboard.
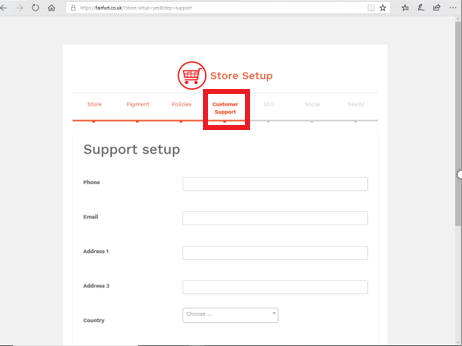
Pic 9: Step 4 - Customer Service
As a next step the vendor can configure or enter their details of customer support, they will be able to enter the phone number, email address and physical address of contact support.
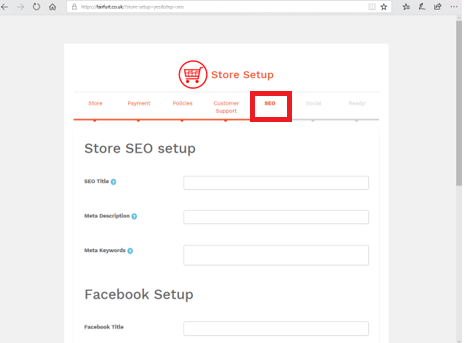
Pic 10: Step 5 - SEO of Vendor Store
At Fairfurt, we empower our vendors with the tool they require to grow their business. Here our vendors will get the feasibility to set their store’s social and SEO related settings. They can enter the following points as listed below
*SEO Title *Meta Description *Meta Keywords *Facebook Title *Facebook Description *Facebook Image *Twitter Title *Twitter Description *Twitter Image
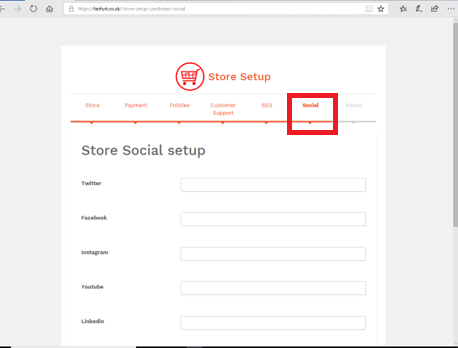
Pic 11: Step 6 - Social Setup
You can also place the links of your social channels in your store for more engagement. Social links in your store definitely boosts your sales as it gives you more opportunities to reach your customers.
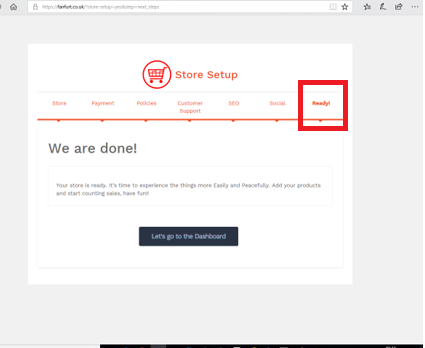
Pic 12: Step 7a - Dashboard
Once the above steps are completed, then you are all done with the setup.
Click “Lets go the the Dashboard”
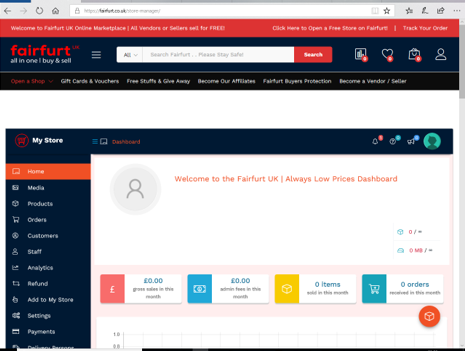
Pic 13: Step 7b - Dashboard
Once you click on “Let’s go to Dashboard” the vendors will be redirected to their respective Dashboard from where they can fill in the remaining or left-over details.
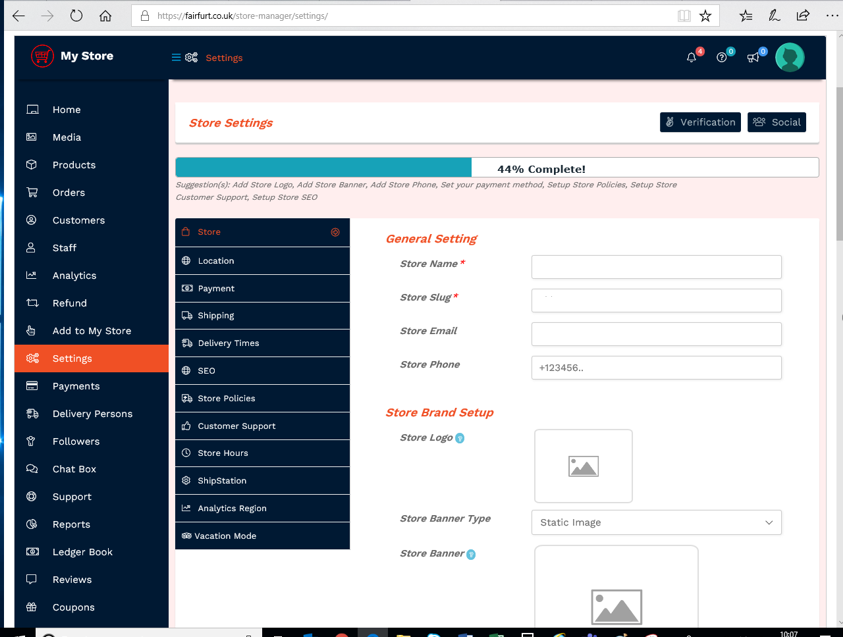
Pic 14: Step 8 - Vendor Dashboard Settings
In addition to the wizard provided above, if and incase the vendor(s) skips any steps they can enter the data from Settings panel in the Fairfurt UK vendor dashboard here: Goto Fairfurt UK Vendor Dashboard -> Settings as shown below.
